This topic describes how to create labels for one or more selected tracks automatically using specified fields such as sequence length, organism, or description. These new names are used solely within the GenVision Pro application.
(Note: to instead name individual items manually, see Rename a single experiment, track, or chromosome.)
To rename a track or chromosome using fields:
- Select a track in the Tracks panel or select the name of a chromosome in the Genome view.
- Do any of the following. Available options will vary depending upon the selection made in Step 1.
- Choose Edit > Rename Track with Fields (or Rename Sequence with Fields) from the main menu.
- From the Actions section of the Details view, click on the Rename Track with Fields link.
- Right-click on the selection and choose Rename Track with Fields or Rename Sequence with Fields.
- Choose Edit > Rename Track with Fields (or Rename Sequence with Fields) from the main menu.
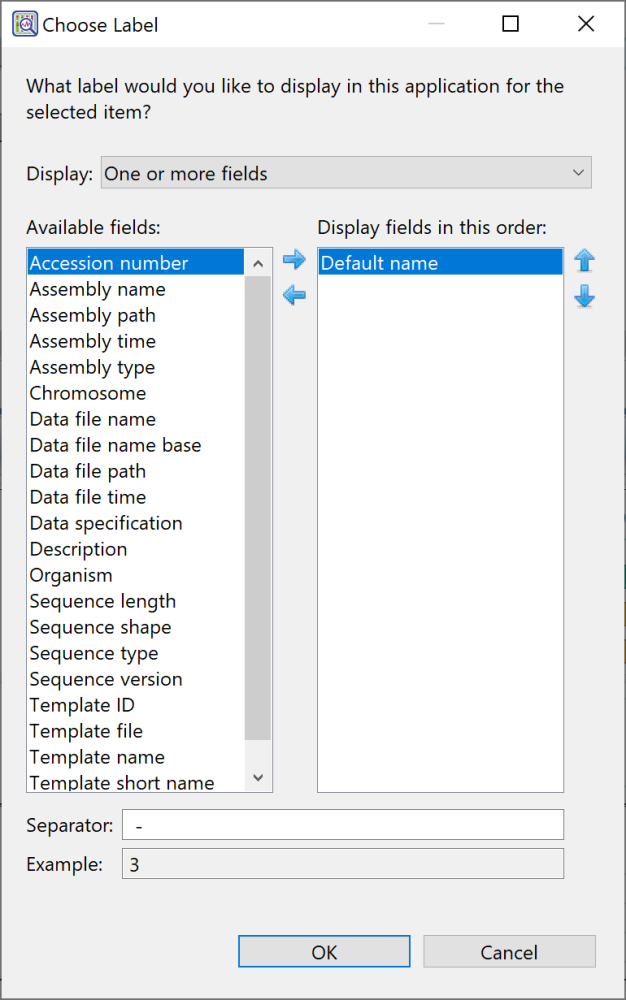
The Choose Label dialog opens with the Display drop-down menu set to One or more fields.

The left pane shows available fields, and the right pane shows fields that will be displayed as part of the sequence name. Initially, Default name is the only field listed in the right pane. An example showing the appearance of the name using the specified field(s) appears in the Example box at the bottom of the dialog.
- Select and organize the fields you wish to display as part of the sequence name:
- To add or remove items, move them between panes using the left and right arrows (
). Use the up and down arrows on the right (
) to specify the order in which displayed fields should appear.
- By default, a hyphen (-) is included between each of the displayed fields. If desired, type in a different Separator. Or remove all text in the Separator box to include nothing between the fields.
- The Example text box shows what the label will look like with the current selections. This text can be manually edited, if desired.
- To add or remove items, move them between panes using the left and right arrows (
- When you are satisfied with the choices made in this dialog, click OK to save changes and exit from the dialog. Or click Cancel to leave the dialog without saving any changes.
Need more help with this?
Contact DNASTAR


 ). Use the up and down arrows on the right (
 ) to specify the order in which displayed fields should appear.