In a typical sequence search, this application contacts the BLAST server at the National Center for Biotechnology Information (NCBI) and searches for sequence matches online. But what if your organization bans or limits online searches? Alternatively, what if you want to search your proprietary sequences instead of—or in addition to—publicly-available sequences? This application’s local BLAST functionality was developed scenarios like these.

You can easily set up local BLAST databases consisting of any combination of sequences downloaded from NCBI and/or your own local sequences. Once the database(s) are set up, all searching can take place offline. You may be surprised to learn that local BLAST searching is much faster than online searching. DNASTAR’s in-house tests show local searches are over 25x faster than running online BLAST, and over 5x faster than performing a BLAST search on the NCBI website directly.


Specify that a local database be used during a BLAST search:

Follow the instructions in Search for sequence matches using BLAST. In the Search screen of the wizard, click Locally and select the local database to use for the search. Local databases are created and managed using the instructions below.


Download, import, and create local databases:

The following functions take place in the Manage Local Databases dialog (AKA “database manager”), which is accessed using Search > Manage Local Databases.
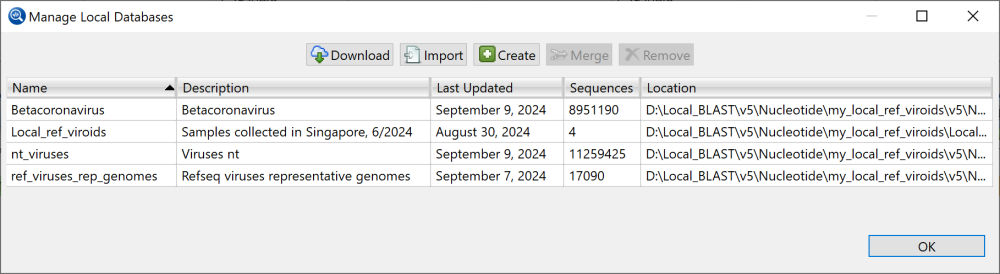


Task How To
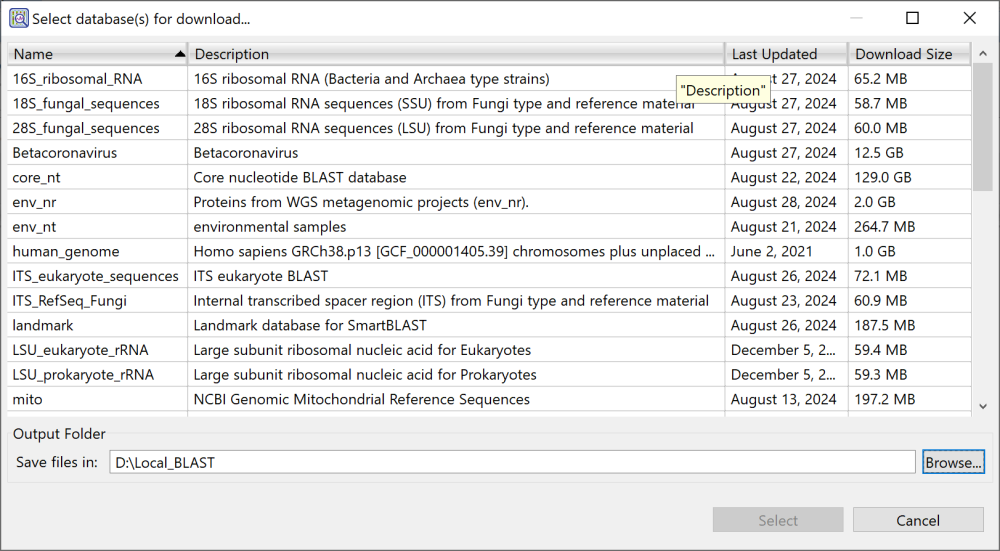
Download a database from NCBI
  1. In the database manager, click the Download button.

  2. From the popup, select any of over 30 NCBI databases.

    Databases range from 57 MB to 400 GB in size. Note that the Download Size column shows the size of the compressed file. Once the file has been decompressed on your local drive, the file size will be approximately twice that size. We recommend downloading only one database at a time and being mindful of your available disk space.

  3. Use the Browse button to navigate to a save location.

    IMPORTANT: Due to an NCBI-specific limitation, both the folder and the entire file path must be free of any spaces. In the image below, note that the save folder was placed in a top-level drive (to eliminate spaces in the file path) and an underscore was used in the folder name.


  4. Press Select to initiate download.

    You can monitor the progress of the download in the Jobs panel.


    Technical note: The file transfer tools Aria2C and 7Zip were installed with Lasergene to download and decompress the database and are located in C:\Program Files (x86)\DNASTAR\Lasergene 18\tools (Win) or Applications\DNASTAR\tools (Mac).
Import a local database
  1. In the database manager, click the Import button.

    Navigate to the folder that contains the database you wish to import. The folder name and the entire path to the folder must be free of spaces (see IMPORTANT note above).

  2. Click Select Folder.

  3. The Add Search Database dialog may be pre-filled with information extracted from the database. If desired, you may overwrite any of this information.


  4. Press Save.
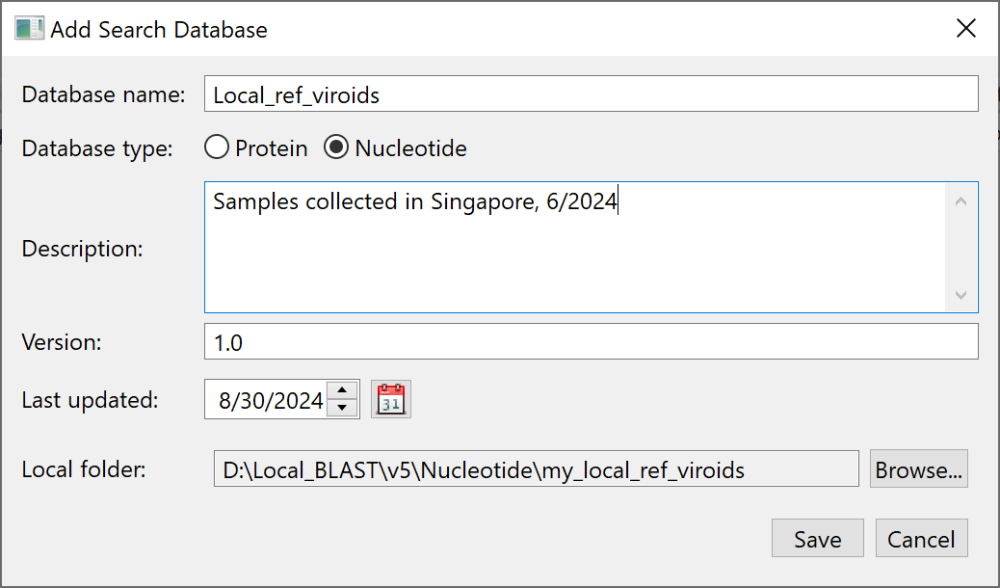
Create a database from local files
  1. In the database manager, click the Create button.

  2. Navigate to and select the files you wish to place in the new database. A wide variety of file types can be used.


    Note: Lasergene .seq files may not always work as database files due to the way they are formatted.

  3. The Add Search Database dialog appears. Fill in the fields as desired. Use the Browse button to select a folder in which to save the database.


  4. Press Save.
Merge multiple databases Say you have five databases and frequently need to search all of them. In the search dialog, you would need to select each of them individually. With “merge,” you can keep these databases intact, but group them together under a shared name for purposes of searching.

  1. In the database manager, select two or more existing databases.

  2. Click the Merge button.

  3. Enter the desired identifying information for the group of databases. Use the Browse button to designate a save location.

  4. Press Save.
Remove a local database In the database manager, select the database and press Remove. Note that this removes the database from the manager. It does not remove it from your computer.

Need more help with this?
Contact DNASTAR

Thanks for your feedback.