To install a standalone version of Lasergene on a Windows computer:
- Log in to your DNASTAR account and go to the My Account page. Press Lasergene for Windows to download the standalone installer.
- Close any open Lasergene applications from a previous installation.
- Double-click on the DNASTAR Lasergene Installer executable (*.exe) file to initiate installation.
- Follow the instructions in the DNASTAR Lasergene Installer screen, and then click Next.
- Read the agreement in the License Agreement screen. If you agree with the terms (required for installation), select the I accept the agreement button, and then click Next.
- In the Installation Directory screen, click Next to install in the default location (recommended). Otherwise, click on the folder icon to select a non-default location for the installation.
- In the Ready to Install screen, click Next. You will see a progress bar showing the progress of the installation.
- If a license for the current version of Lasergene is not detected, the Lasergene Authorization dialog will open.
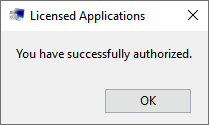
Select Standalone and enter your Product Key. Your Product Key can be found on your My Licenses page of the DNASTAR website. (If you cannot find the key there, please contact us). Press the Authorize button. If you authorized the software using a recognized key, you will receive the following message. Press OK.
- When installation is complete, press Finish. The DNASTAR Navigator will launch automatically.
The installed Lasergene applications can now be accessed via the DNASTAR Navigator or the DNASTAR Lasergene ‘x’ folder in the Start menu.
Troubleshooting:
Need more help with this?
Contact DNASTAR


