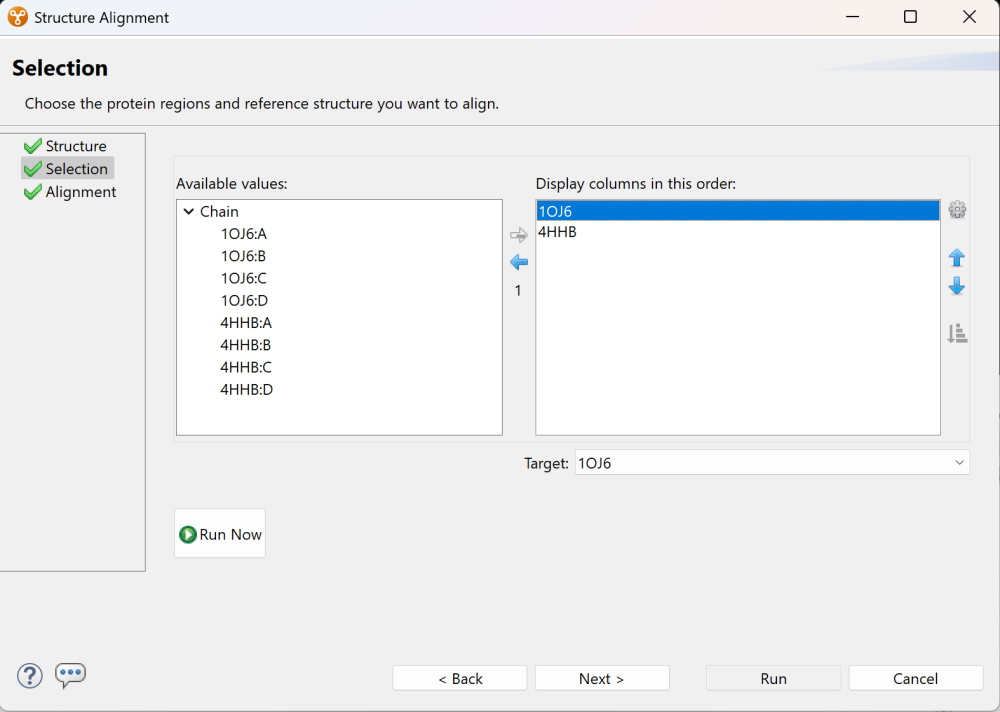
The Selection screen is the second of three screens in the Structure Alignment wizard. Available but yet-unchosen columns are on the left, while currently-chosen columns are on the right. By default, each “whole structure” is chosen for display, and will appear on the right.

- Choose whether to align chains or whole structures, and also the order in which to display the columns. See the table below to learn how to specify and sort the columns you wish to display.
| Task | How To |
|---|---|
| Expand the Chain category to see available sub-options | If nothing appears under Chain on the left, click the gray arrow next to it to display a list of chains. |
| Add a column to the display | Select its name on the left and press the right arrow key to move it to the right. |
| Remove a column from the display | Select its name on the right and press the left arrow key to move it to the left. |
| Change the order of displayed columns | Select the column name you wish to move on the right, then use the up/down arrows ( |
| Sort selected columns alphabetically | Choose columns in the right pane using Shift+click or Ctrl/Cmd+click. Then click the Sort selected columns by name tool ( |
| Change the name of a column | Select its name on the right, then choose the Configure column tool ( ) from within the Choose Columns dialog (i.e., not the tool with the same icon in the Variants view header). In the popup dialog, type in the desired name and press OK. ) from within the Choose Columns dialog (i.e., not the tool with the same icon in the Variants view header). In the popup dialog, type in the desired name and press OK.  |
- Use the Target drop-down menu to select the desired target structure.
If you don’t want to change alignment options, you can press the Run Now or Run buttons to initiate the alignment. Otherwise, click Next to proceed to the Alignment screen. That topic also includes information on post-alignment analysis, in case you clicked Run or Run Now on this screen.
Need more help with this?
Contact DNASTAR


