In this part of the tutorial, you will learn how to set up the project in SeqMan NGen and (optionally) run the assembly. To perform the assembly in Part A, you must download a 4 GB zipped data folder that unpacks to 14.3 GB. We expect most to simply read this section, then proceed to Parts B & C, where you can download a 4 MB data set and perform the downstream analysis part in ArrayStar.
- (optional) If you plan to run the assembly (most readers will not), download T1_RNA-Seq.zip (4.0 GB) and extract the contents to any convenient location (e.g., your computer’s desktop). The folder contents consist of:
- The E. coli reference sequence: Escherichia coli str. K-12 substr. MG1655.U00096.gbk
- The sample sequences: six folders beginning with flhC, flhD and WT.
- The E. coli reference sequence: Escherichia coli str. K-12 substr. MG1655.U00096.gbk
- Launch SeqMan NGen and press New Assembly.
- Select the RNA-Seq / Transcriptomics tab on the left and choose RNA-seq from the Quantitative Analysis section on the right.
- In the Reference Sequence screen, press the Add button and open the Escherichia coli str. K-12 substr. MG1655.U00096.gbk. (Alternatively, drag the file from your file explorer and drop it onto the large white space in the middle of the wizard screen.) Click Next.
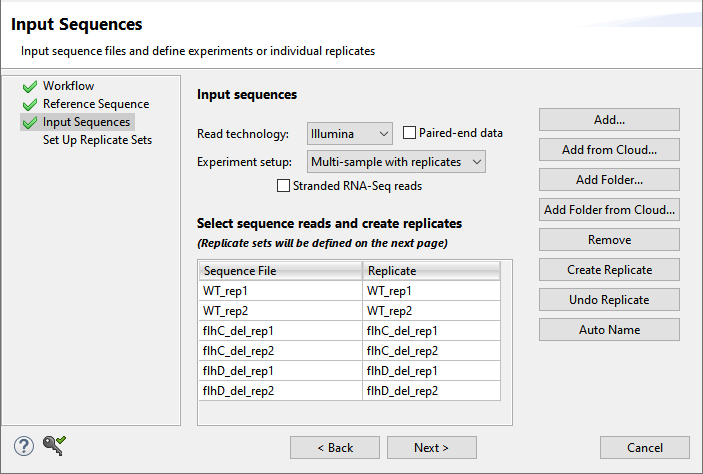
- In the Input Sequences screen:
- Keep the Read technology set at Illumina.
- Uncheck the paired-end data box if present.
- Next to Experiment setup, select Multi-sample with replicates.
- Use the Add Folder button six times, each time adding one of the six sample folders from the tutorial data folder.
- Click Next.
- Keep the Read technology set at Illumina.
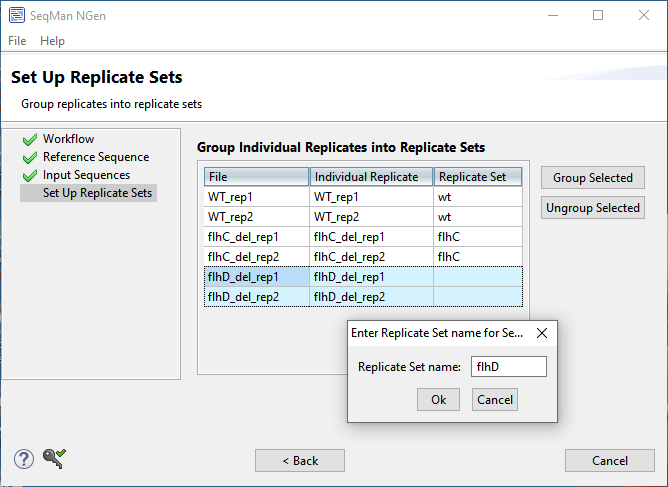
- In the Set Up Replicate Sets screen:
- Select the two WT replicates and click on the Group Selected button. In the dialog, name the set “wt” and click OK.
- Do the same for the two flhC replicates, naming the set “flhC.”
- Do the same for the two flhD replicates, naming the set “flhD.”
- Click Next.
- Select the two WT replicates and click on the Group Selected button. In the dialog, name the set “wt” and click OK.
- In the Set Up Experiments screen, specify the “wt” group as the control. To do this, check the Is Control box to the right of “wt,” then click Next.
- In the Assembly Options screen, check the box next to Maximum total reads and enter 5000000 (5 followed by 6 zeros) to reduce the assembly time. Click Next.
- In the Analysis Options screen, make no changes, but observe that the RNA-Seq normalization method is DESeq2. Click Next.

- In the Assembly Output screen, type “Templated RNA-seq” into the Project Name text box. This name will be assigned to all output files, including the finished assembly. Use the Browse button to specify a Project Folder for your assembly output files, then click Next.
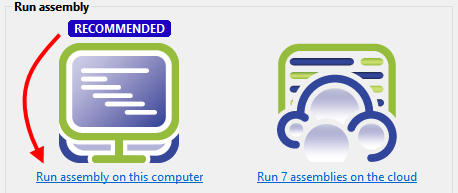
- In the Run Assembly Project screen, observe the recommendation for where to run the assembly. Press the link under that recommendation.
- Wait until being informed that assembly has finished (approximately 10-20 minutes for a local assembly), then click Next.
- From the Assembly Summary screen, click Analyze differential gene expression. This launches ArrayStar.
- (optional) Close SeqMan NGen by clicking the Finish button.
- Within ArrayStar, use File > Save Project to save the project as Templated_RNA-Seq.astar.
Proceed to Part B: Analyzing the results in ArrayStar using quick gene sets.
Need more help with this?
Contact DNASTAR


