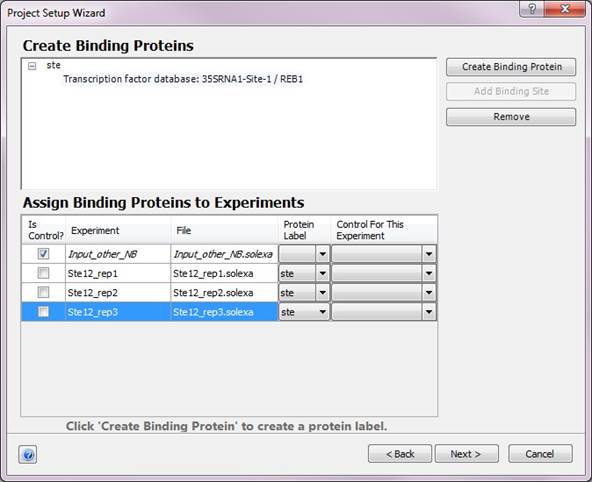
The Create Binding Proteins dialog allows you to specify binding proteins and controls for your ChIP-Seq experiments. QSeq can use the binding sites you specify to locate regions to search for peaks. If binding sites are specified, QSeq will also report the location of these sites within the located peaks after processing the data.

Click Create Binding Protein to bring up the Add Binding Protein dialog, where you can define a binding protein and binding site (if known) for your project.
You may also create multiple binding sites for a single protein by highlighting a binding protein that you have added to the list and clicking Add Binding Site. This will also bring up the Add Binding Protein dialog.
You may delete proteins and binding sites from the list by highlighting them and then clicking Remove.
Each experiment shown in the bottom pane of the window must either have an associated binding protein or be labeled as a control. Check the box under the Is Control? column next to an experiment to label it as a control. Choose a binding protein to use for an experiment from the drop-down menu in the Protein Label column. Note that if an experiment is labeled as a control, you cannot associate it with a binding protein. You can define the control for your experiments using the Control for This Experiment drop-down menus.
Tip: To associate a single binding protein or control with multiple experiments at one time, Shift+click on the experiments to select them, then right-click and choose Use binding protein…for selected experiments or Use…as control for selected experiments.
Click Back to return to the Add Experiments to Import step of the Project Setup Wizard; Next to process your data and proceed to the next step of the wizard; or Cancel to close the Project Setup Wizard without adding any data to the project.