Follow the steps below to modify a vector definition in the Vector Catalog:
1) Select Project > Vector Catalog.
2) Select the name of the vector you wish to edit.
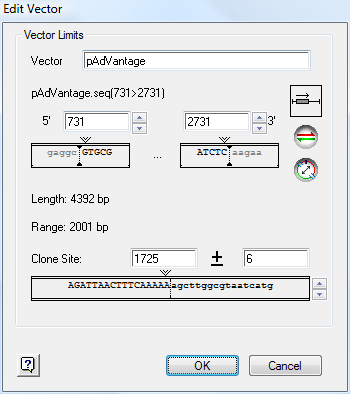
3) Click Edit to open the Edit Vector window.
4) In the Vector field, edit the vector name, if desired.
5) Set a range for the vector sequence in the 5’ and 3’ boxes. You may input negative numbers, if desired. For instance, if the clone site were in position 75, you could enter –925 into the 5’ box and 1075 into the 3’ box to leave 1000 base pairs on either side without knowing the length of the vector.
6) In Clone Site, enter the coordinates of the clone site and a range in the ± box. If you know the precise clone site, enter the position and use a range of ± 1. If you want a single definition for a number of sites in a polylinker, enter the midpoint position of the range of sites. If you use multiple sites in the same vector for different projects, you may define a separate vector entry for each clone site, provided you give each definition a different vector name.
7) Click OK to accept the modified definition.
See Vector Guidelines for suggestions on optimizing the vector definition for vector removal.