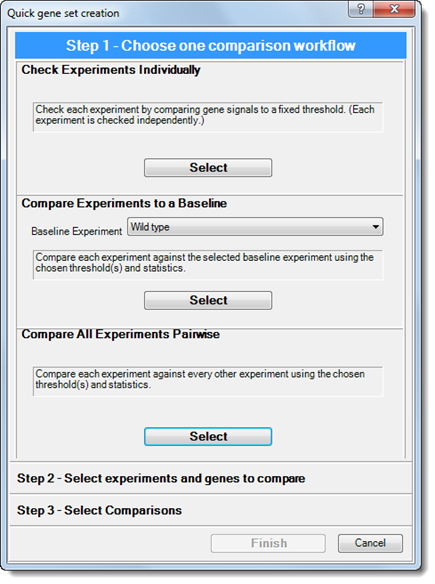
The first step of the Create a Quick Gene Set wizard appears below:
Note: If you used DESeq2 or edgeR normalization, Step 1 is disabled. The control is instead selected automatically.
In this wizard step, you must press only one of three Select buttons offered:
•Check Experiments Individually – Click the corresponding Select button if you want to compare each data point from each experiment to a specified threshold to determine inclusion.
•Compare Experiments to a Baseline – Pick an option from the Baseline Experiment drop-down menu and then press the corresponding Select button to perform pairwise comparisons between each selected experiment and the specified baseline experiment. This will result in as many sets as there are experiments. The available baseline experiments will vary depending upon your project setup and will include any available top-level experiments: either single experiments or replicate sets. The baseline experiment is included in the pairings, but only as the baseline for each of the other pairings and not as a separate pairing. If you plan to use a P-value threshold, note that the baseline experiment must be a replicate set.
•Compare All Experiments Pairwise – Click the corresponding Select button to determine inclusion based on all possible pairwise comparisons of the selected experiments. When you choose this option, identical pairing (‘a’ vs. ‘a’) is not used. Each of the other pairings are included only once, never in both directions (‘a’ vs. ‘b,’ but not also ‘b’ vs. ‘a’).
After pressing any of the three Select buttons, you
will automatically be taken to Step 2 of the wizard. To
return to Step 1, you can click the “up arrow” button ( ) at the top of the dialog.